Are you using a recent version of DSM? Then you can easily have the bHosted DynDNS functionality automatically update the IP address of your domain name as soon as your IP address changes. DSM has the Customize option for this.
Log in to DSM. This can usually be done from your local network via http://diskstation:5001. After logging in, choose Control Panel and then External Access. Click on the DDNS tab (if it is not already active) and click on Customize directly below the tabs:
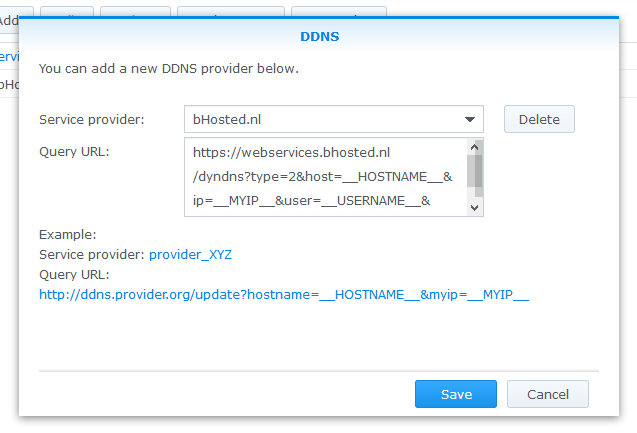
For Service provider, enter bHosted.nl. For Query URL, enter the following:
Click on Save and then on the Add button. For Service Provider, choose bHosted.nl:
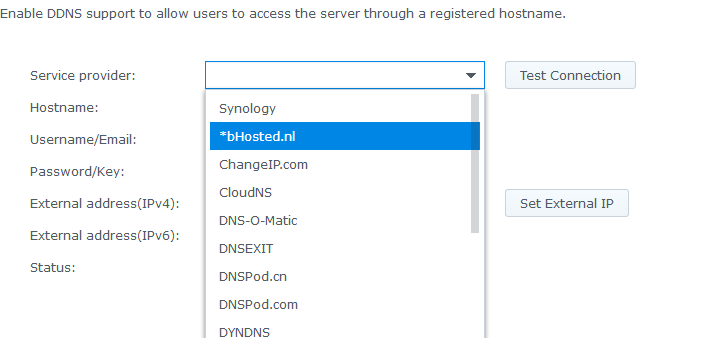
For Hostname, enter the DNS A record you want to change, for example nas.bhosted-tutorials.nl or thuis.bhosted-tutorials.nl. Of course, replace bhosted-tutorials.nl with a domain name that is in your bHosted.nl account. For Username, enter the login details you also use to log in to the bHosted.nl control panel (https://mijn.bhosted.nl). For Password, contact the bHosted helpdesk so we can give you the correct MD5 password.
Don't forget to also create an A record in the DNS editor for the subdomain you want to use. Point this record to the IP address of your server. After creating a DNS record, it takes about 60 minutes before it is known everywhere.
Then click on Test Connection. The status should now be Normal. Click the OK button to save everything. From now on, your Synology will automatically update the external IP address for the specified hostname as soon as a new external IP address is detected.