Do you want to change the DNS settings of your domain name, for example by adding a TXT, CNAME or A record? In the bHosted control panel, you can easily do this via the DNS editor. Below, we explain step by step how it works.
Logging in to the control panel
Go to the bHosted control panel: https://mijn.bhosted.nl
Log in with your username (login) and password.
Navigating to your domain
Are you logged in? Then follow these steps:
-
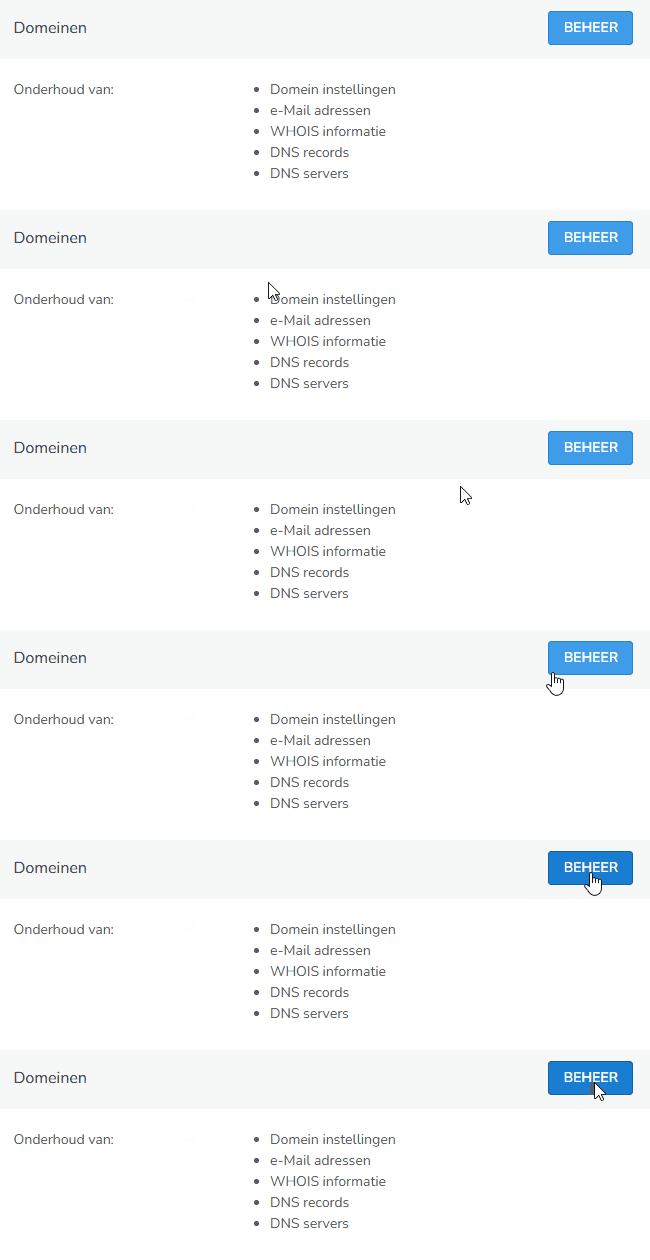
Click Manage on the right behind Domains
-
On the next page, select the domain name for which you want to change the DNS
Opening the DNS editor
On the domain page:
-
Click DNS editor on the right-hand side

-
You will now see an overview of all your current DNS records
Adding DNS records
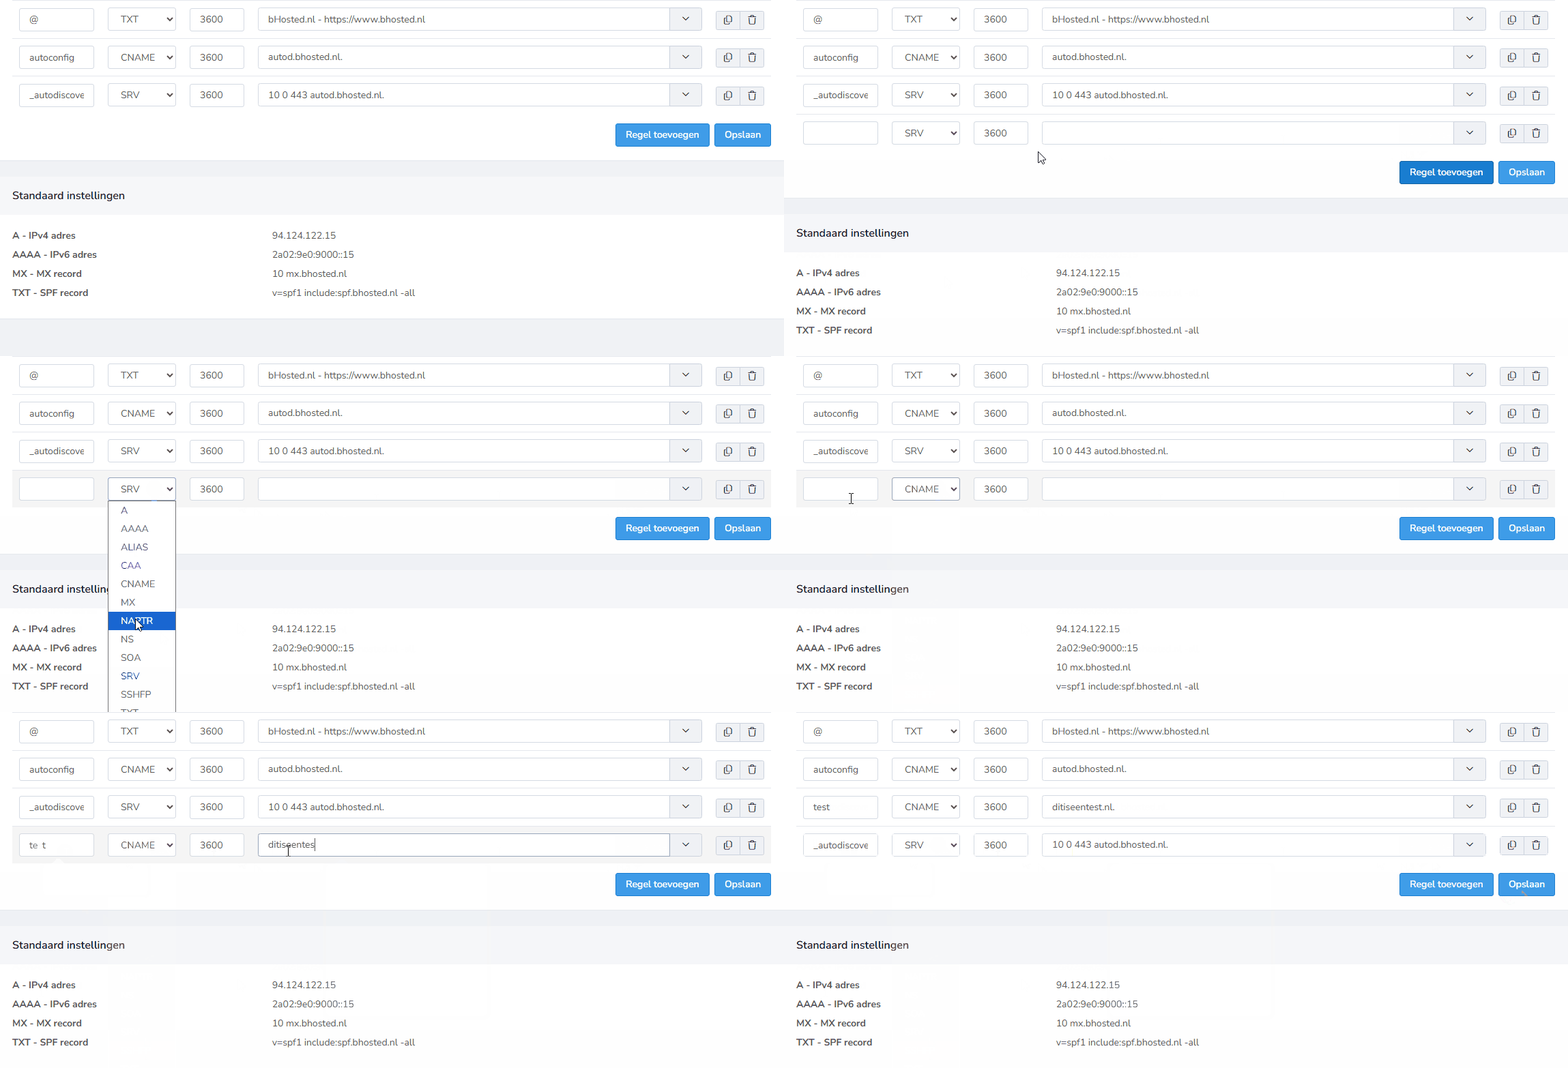
- Do you want to add a record? Then choose Add rule at the bottom.
- For the new rule, select the type of record you want to add under Type.
- Enter the name and the content, then click Save.
Editing DNS records
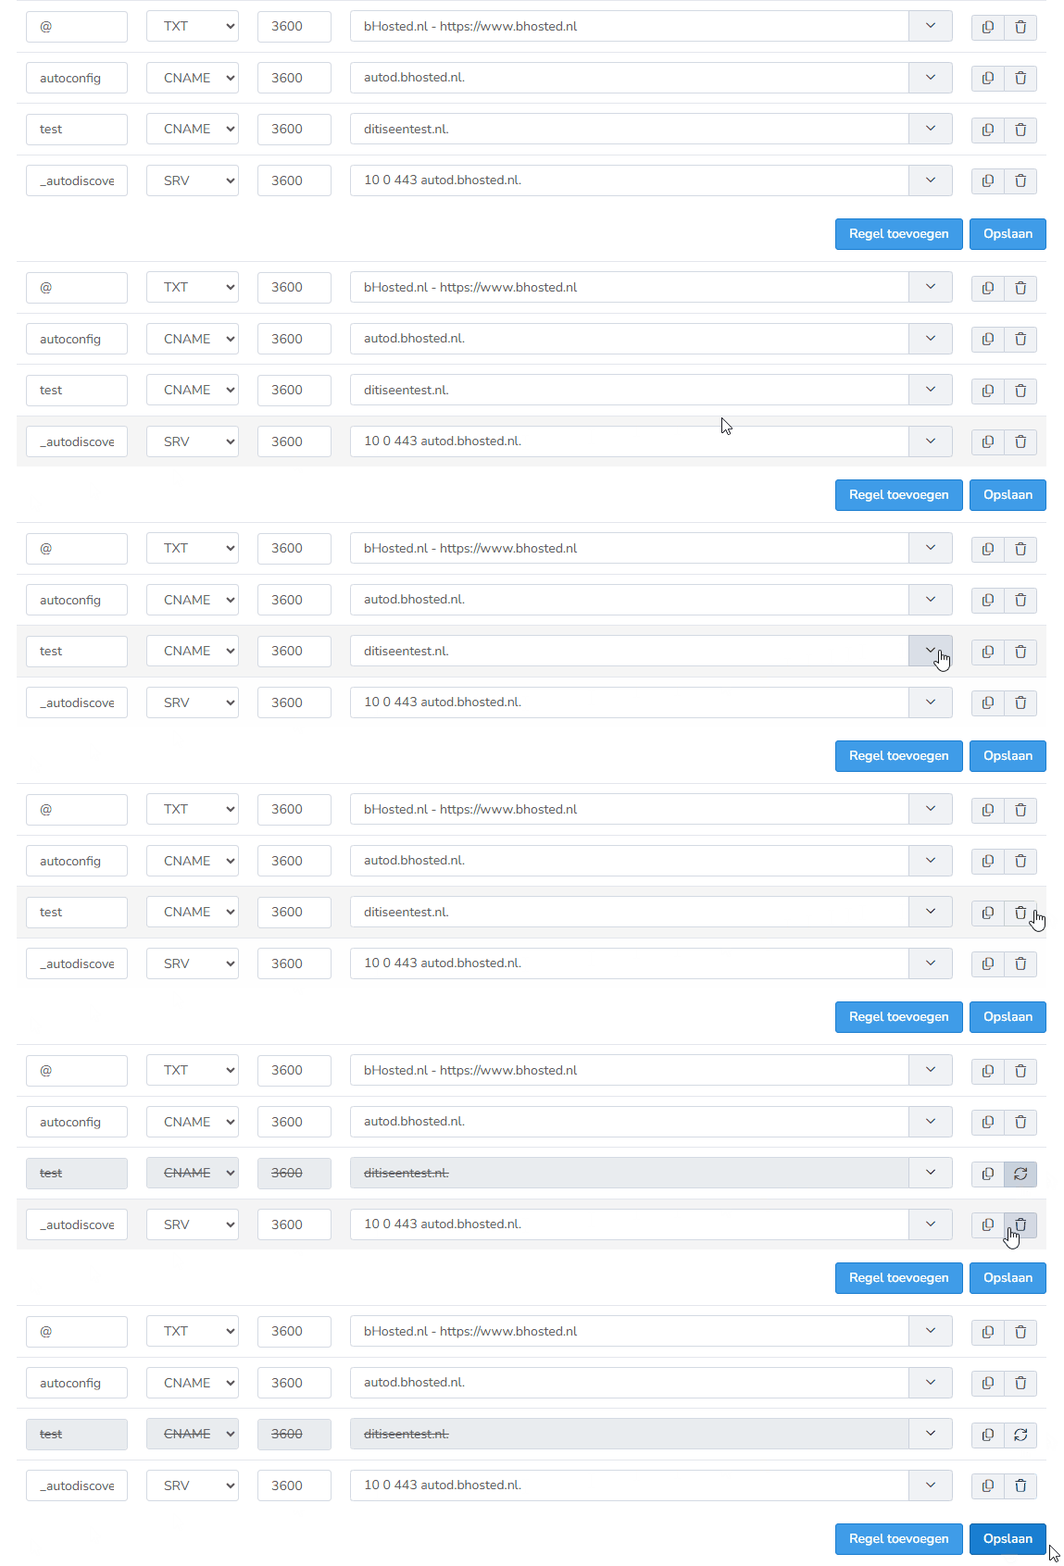
- Do you want to edit an existing record? Click on the field whose content you want to change.
- Edit the content of the field and then click Save.

Deleting DNS records
- Do you want to delete a record? Click the trash can icon behind the record.
- After adding or editing a record, don't forget to save your changes by clicking save at the bottom.
Please note: it usually takes about 60 minutes for a DNS change to fully propagate everywhere.
Viewing default settings
At the bottom of the DNS editor page, you will find the default DNS settings that apply to your account. Handy as a reference when adjusting your own records.
Important tips
- Always check that you enter the correct values.
- Changes sometimes take some time to become active worldwide (DNS propagation).
- Do not delete records if you are not sure what they are for.
Having trouble changing DNS?
Are you unable to add or edit DNS records? Feel free to contact the bHosted helpdesk. We'll be happy to help you.