With bHosted's spam filter, you automatically block unwanted emails. Via the control panel, you decide how strict the filter is and which senders you want to allow or block.
Step 1: Log in to the control panel
Go to the control panel via: https://mijn.bhosted.nl
Log in with your username and password.
Step 2: Go to your domain management
-
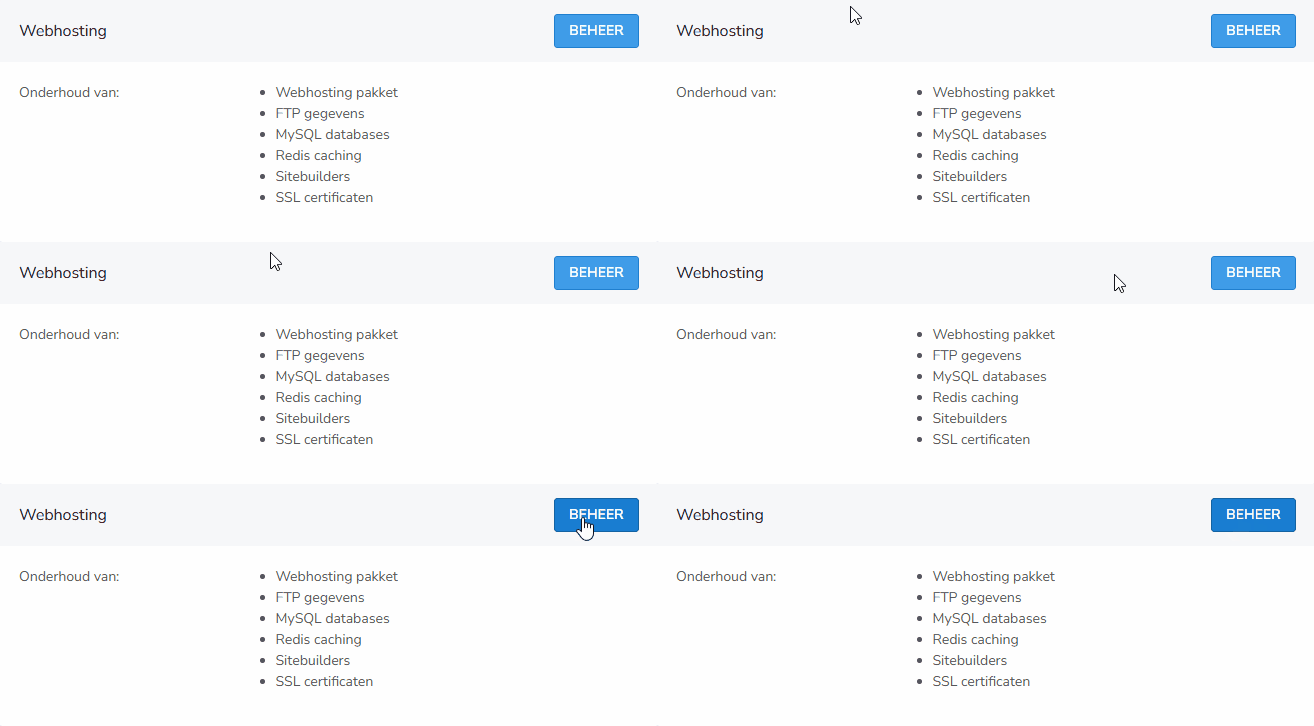
In the control panel, on the right-hand side under "Domains", click "Manage".
-
Select the domain for which you want to set up the spam filter.
Step 3: Open the spam filter settings
On the right-hand side of the page, you will find the Mail Filter option.

Click on it to open the spam filter settings.
Step 4: Adjust the spam filter
Within Mail Filter, you manage the following settings:
Turn the spam filter on or off
- At the top of the page, you can easily turn the spam filter on or off.
Set the strength of the spam filter
- You set a value for the strictness of the filter.
- The lower the value, the stricter the spam filter is.
- The higher the value, the less strict the spam filter is.
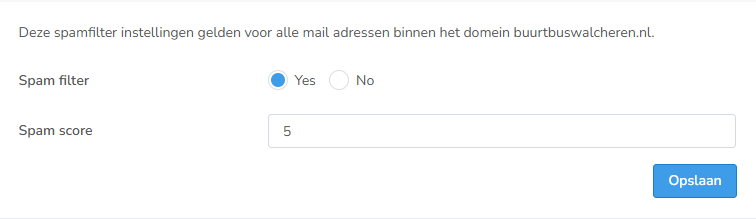
After making a change, click save to apply it.
Step 5: Manage whitelist and blacklist
You can allow or block specific senders yourself:
- Whitelist Add domains, email addresses, or IP addresses that you always want to allow.
- Blacklist Add domains, email addresses, or IP addresses that you always want to block.
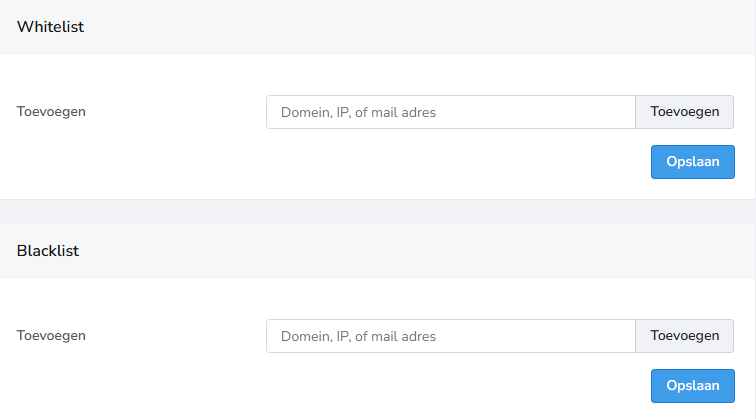
After making a change, click save to apply it.
Tips
- Start with an average filter setting and adjust it based on your experience.
- Regularly check your blocked emails to see if the filter is set up correctly.
- Add important senders to the whitelist, so their emails are never accidentally blocked.
Problems or questions?
Not sure about the right settings, or is the spam filter not working as expected? Feel free to contact bHosted's helpdesk. We're happy to help.